
Radon Sub-Slab Depressurization Explained
Sub-slab depressurization is the most common professional method used to reduce high radon in homes with a basement or slab foundation. If you have ever seen a white PVC pipe running up the side of a house with a fan on it, you have probably seen one.
This article explains sub-slab depressurization in plain English. We will cover what it is, how it works, what the system components do, what installation is like, what results to expect, what it costs, and how to maintain it so it keeps working for years.
Radon decision anchor: The EPA recommends fixing a home if the radon level is 4.0 pCi/L or higher and also recommends considering action between 2.0 and 4.0 pCi/L. EPA action level guidance.
Table of Contents
- What sub-slab depressurization is
- Why it works (in simple terms)
- How radon gets into a home
- The parts of a sub-slab depressurization system
- How the system works step by step
- Which homes are good candidates
- Common variations: drain-tile suction, sump suction, block-wall suction
- How pros design the system (and why diagnostics matter)
- What installation day is like
- What results to expect
- Cost, electricity use, and typical long-term expenses
- Testing after installation and ongoing retesting
- Maintenance: how to keep it working
- Common problems and how they are fixed
- How to choose a contractor
- FAQs
- Sources
What sub-slab depressurization is
Sub-slab depressurization is a radon mitigation method that reduces radon by pulling air from beneath the concrete slab of your home and venting it safely outside. The goal is to keep radon from entering the living space in the first place.
You will also see it referred to as “sub-slab depressurization,” “sub-slab suction,” or as part of the broader category “active soil depressurization.” National Radon Program Services (Kansas State University) describes sub-slab depressurization as a simple system using underground pipes and an exhaust fan that removes radon from below the concrete floor and foundation before it can enter the home. NRPS mitigation basics.
Importantly, this method usually does not require major changes to your home. The system is installed, the fan runs continuously, and the home is retested to confirm the radon level dropped. NRPS mitigation basics.
Why it works (in simple terms)
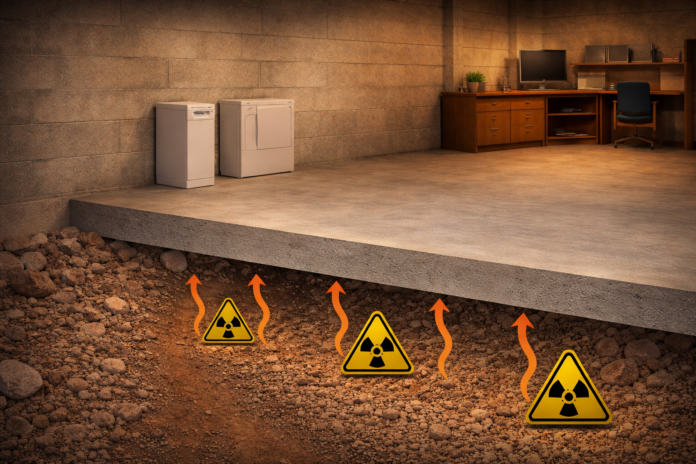
Think of your home like a straw sitting on top of the soil. The soil contains radon gas. Your home can pull soil air in through tiny openings like cracks, joints, and gaps around pipes. That soil air carries radon.
Sub-slab depressurization changes the direction of the flow. Instead of soil air being pulled into the home, the mitigation system creates a lower pressure region under the slab and routes that soil gas into the mitigation pipe. The fan then pushes the gas up and out above the roofline where it disperses.
In other words, the system gives radon a better path out of the ground than your house provides. That is why it tends to be so effective.
How radon gets into a home
Radon is produced naturally from uranium in soil and rock. Outdoors, radon usually dilutes quickly. Indoors, it can build up when soil gas enters a home faster than the home exchanges indoor air with outdoor air.
EPA explains a key idea that makes sub-slab depressurization make sense: air pressure inside a home is usually lower than pressure in the soil around the foundation, and because of this difference, the home acts like a vacuum that draws radon in through cracks and other openings. EPA Consumer’s Guide to Radon Reduction (PDF).
The openings that matter are not always dramatic. Some are obvious, like a sump pit or a large slab crack. Others are subtle, like the gap where the slab meets the wall, a control joint, a plumbing penetration, or a hollow block wall cavity. This is why sealing alone is rarely a reliable cure. NRPS notes that sealing is a basic part of most approaches but is not recommended as the only strategy because it has not been shown to lower radon significantly or consistently and because new openings can form as a house settles. NRPS mitigation basics.
Sub-slab depressurization is designed for this reality. It does not require you to find and permanently seal every pathway. It instead reduces the driving force that pulls radon in.
The parts of a sub-slab depressurization system
A sub-slab depressurization system looks simple from the outside, but each part has a job. Understanding those jobs makes it easier to troubleshoot problems later.
1) The suction point
This is the connection to the soil under the slab. The contractor usually creates a small cavity under the slab (often called a suction pit or suction hole) so air can move more freely into the pipe. In some homes, the suction point ties into an existing drain system or sump area instead of creating a new pit.
2) The vent pipe (usually PVC)
The pipe carries soil gas from under the slab to the discharge point. You will often see 3-inch or 4-inch PVC. The right size depends on the design, the fan, and the needed airflow and pressure.
3) The radon fan
This fan runs continuously. It creates suction under the slab and moves the soil gas up through the pipe. EPA notes that fans may last five years or more and may eventually need repair or replacement. EPA system maintenance guidance.
4) The exhaust termination
The pipe terminates above the roofline or at a location designed to safely disperse the exhausted gas. The goal is to avoid the exhausted radon being pulled back inside through windows or other openings.
5) A system indicator (often a U-tube manometer)
Most systems include a simple pressure gauge that shows whether the fan is creating suction. This gauge does not measure radon. It measures pressure difference in the pipe. You still need to test to confirm radon levels are low.
6) Sealing and lid work (supporting role)
Sealing cracks, sealing sump lids, and addressing large openings can improve system performance and reduce the loss of conditioned indoor air. NRPS describes sealing as a basic part of most radon reduction approaches because it limits radon entry and improves the effectiveness and efficiency of other techniques. NRPS mitigation basics.
How the system works step by step
Step 1: The fan creates suction in the pipe.
When the fan runs, it lowers the air pressure inside the mitigation pipe.
Step 2: The suction extends under the slab.
Because the pipe is connected to the soil under the slab, the suction creates a lower pressure zone beneath the concrete.
Step 3: Soil gas flows toward the lower pressure area.
Gas moves from higher pressure to lower pressure. Instead of soil gas being pulled into the home, soil gas is pulled into the suction pit and into the pipe.
Step 4: The system vents the gas outdoors.
The fan pushes the gas up and out of the home, typically discharging above the roofline where it disperses.
Step 5: The home is retested to confirm the result.
This is the verification step many homeowners skip. EPA’s Consumer’s Guide emphasizes testing after installation to make sure the system works well. EPA Consumer’s Guide (PDF).
That is the entire concept. Everything else is execution details that help the system do those five steps efficiently and reliably in your specific home.
Which homes are good candidates
Sub-slab depressurization is most commonly used in homes with a basement or slab-on-grade foundation. It is usually a strong fit when there is a continuous concrete slab in contact with the ground. In many cases, it can be installed with minimal disruption.
Homes with crawlspaces typically use a similar concept but with a different implementation, often called sub-membrane depressurization. The idea is still depressurizing the soil gas area. The difference is that the “slab” is replaced by a sealed membrane that acts as a barrier over the crawlspace soil.
Homes with more than one foundation type are common. For example, a home might have a basement under part of the house and a slab under an addition. NRPS notes that multiple foundations can present challenges and sometimes require a combination of techniques or connected systems. NRPS mitigation basics. This is one of the biggest reasons professional diagnostics matter. A one-size solution can underperform when the foundation layout is mixed.
Common variations: drain-tile suction, sump suction, block-wall suction
Many homeowners assume every system is one pipe drilled through the slab. In reality, there are variations that use the same physics.
Drain-tile or perimeter suction: Some basements have a drain-tile system around the foundation. If it is accessible and connected, it can sometimes serve as an excellent air collection pathway, allowing suction to extend under a wider area with fewer suction points.
Sump pit suction: If a home has a sump pit that connects to sub-slab drainage, a mitigator may use the sump area as part of the collection pathway. In those cases, a sealed sump lid becomes very important because an open sump can become a direct soil gas entry point.
Block-wall suction: Homes with hollow block foundation walls can sometimes have radon moving through the block cavities. In those cases, mitigation designs may include strategies that address that pathway, sometimes in combination with sub-slab suction.
The key idea is that the system design should match the way air moves under your specific foundation. That is why a trained mitigator often performs a visual inspection and sometimes diagnostic tests before finalizing the design. NRPS discusses diagnostic tests being used when inspection alone does not provide enough information. NRPS mitigation basics.
How pros design the system (and why diagnostics matter)
Homeowners often ask, “How strong does the fan need to be?” The answer is not based on your radon number alone. It is based on how easily air can move beneath your slab and how far the suction must reach to pull soil gas away from the entire slab area.
If air moves easily under the slab (for example, because of a gravel layer), one suction point may influence a large area. If air does not move easily (tight soil, compacted fill, or an unusual slab design), the home may need multiple suction points or a different approach.
EPA’s Consumer’s Guide notes that contractors may perform diagnostic tests to help determine what type of radon reduction system should be used and that these tests may be necessary in some cases, especially when the structure is unfamiliar or the difficulty is higher. EPA Consumer’s Guide (PDF).
In practical terms, good mitigation design often includes thinking through these questions:
How many separate foundation sections exist? Does the slab have a gravel layer? Is there a connected drain system? Is there a sump? Are there finished walls hiding slab edges? Is there a fireplace, large exhaust fan, or strong stack effect creating low pressure? Are there rooms with slab penetrations or obvious openings?
None of this is meant to scare you. It is meant to explain why a professional installation can outperform a “generic” installation. The same pipe and fan can produce very different results depending on how well the system fits the building.
What installation day is like
If you are picturing major demolition, most homeowners are pleasantly surprised. Many sub-slab depressurization installs are completed in a day, sometimes spilling into a second day depending on complexity and routing.
In most homes, the process looks like this:
First, the contractor confirms the plan and chooses the suction point location. They are trying to pick a location that gives good suction coverage and a clean pipe route.
Next, they create the suction pit. This often involves drilling a hole through the slab and removing a small amount of material below the slab to create an air collection cavity. This part is noisy and dusty, but it is usually short.
Then they route the pipe. The pipe may run through a garage, mechanical room, unfinished basement space, or up an exterior wall. The routing is often the part homeowners care about most visually, so this is where good contractors balance performance and appearance.
Then they install the fan and electrical connection. The fan is commonly placed in an attic, garage, or outside, rather than in living space. The fan must be powered continuously.
Then they install the system indicator and seal key openings. They may install a manometer and label it. They may seal large cracks or seal the sump lid as a supporting step.
Finally, they review operation and next steps. The contractor should explain what the system indicator means, what “normal” looks like, and when and how you should perform a post-mitigation test.
NRPS also emphasizes that the right system depends on the design of the home and that multiple foundations may require combined techniques. A good installer will not treat your home like a generic template. NRPS mitigation basics.
What results to expect
Homeowners want a simple promise: “How low will it go?” The honest answer is that results vary, but proven systems often reduce radon dramatically.
EPA’s Consumer’s Guide says radon reduction systems work and notes that some radon reduction systems can reduce radon levels by up to 99 percent. EPA Consumer’s Guide (PDF). The same guide also notes that with today’s technology, radon levels in most homes can be reduced to 2 pCi/L or below. EPA Consumer’s Guide (PDF).
Those statements are not guarantees for every home. They are an indication of what is often achievable with good design and proper installation.
What you should expect from a good contractor is not a vague promise. You should expect a clear plan for verification. Some contractors include a guarantee to reduce radon to 4.0 pCi/L or below, and some will negotiate a lower target. The important part is that the guarantee terms and the testing method are written clearly, and that you verify performance with a post-mitigation test. EPA Consumer’s Guide (PDF).
Cost, electricity use, and typical long-term expenses
Installation cost: NRPS states that the average cost for a contractor to lower radon levels in a home is about $1,200, with a typical range from about $800 to $2,500, depending on the home’s size, design, and needed methods. NRPS mitigation basics. EPA’s Consumer’s Guide similarly frames mitigation as usually costing about the same as other common home repairs and emphasizes getting estimates from one or more qualified contractors. EPA Consumer’s Guide (PDF).
Electricity cost: Radon fans are designed for continuous operation. Power use varies by fan model and system resistance. In many homes the electricity cost is noticeable but not extreme. If the electricity cost becomes a concern, the safer move is to ask a mitigator about fan sizing and system efficiency, not to turn the fan off.
Fan replacement cost: EPA notes that fans may last for five years or more and that replacing a fan will cost around $200 to $350 including parts and labor. EPA system maintenance guidance.
Testing cost over time: Budget for periodic retesting, especially if you prefer professional testing or if you want long-term tests for a better year-round average.
Testing after installation and ongoing retesting
The system is not “done” until it is verified by testing. This is not optional if you want confidence. It is the difference between believing the system worked and knowing it worked.
EPA’s Consumer’s Guide explicitly calls out testing after installation to make sure the radon reduction system works well. EPA Consumer’s Guide (PDF).
After that, radon should not become a “set it and forget it” topic. EPA recommends looking at your warning device regularly and says it is a good idea to retest your home at least every two years to be sure radon levels remain low. EPA system maintenance guidance.
Retesting is especially smart after major changes, like finishing a basement, changing HVAC, sealing the building envelope, or altering how the lowest level is used.
Maintenance: how to keep it working
Most sub-slab depressurization systems require very little day-to-day effort, but they do require basic awareness. EPA compares radon reduction systems to things like furnaces or chimneys in the sense that they need occasional maintenance. EPA system maintenance guidance.
In practice, maintenance usually means four things.
1) Check the system indicator occasionally. If your manometer suddenly shows a different reading than normal or indicates no pressure difference, it can mean the fan is off, a pipe connection is compromised, or something changed in the system.
2) Listen for noise changes. A healthy fan is usually a steady hum. A new high-pitched whine or grinding noise often signals bearing wear and approaching fan failure.
3) Keep the fan powered continuously. Fans are intended to run 24/7. Turning them off increases radon risk and removes the whole purpose of the system.
4) Retest on a schedule. This is the only way to confirm indoor radon remains low over time. EPA suggests retesting at least every two years. EPA system maintenance guidance.
Common problems and how they are fixed
When sub-slab depressurization underperforms, the fix is usually one of a few categories. This section is meant to help homeowners understand the logic of troubleshooting, not to encourage DIY electrical or structural work.
Problem: Radon is lower but still above the target.
This can happen when suction does not extend under the entire slab or when the home has multiple foundation sections. A mitigator may add a second suction point, adjust the fan selection, improve sealing of major openings (especially sump lids), or redesign a section of the system so it collects soil gas more effectively. Multiple-foundation homes are specifically called out as potentially needing combined techniques. NRPS mitigation basics.
Problem: The system is loud indoors.
This is often vibration transfer rather than the fan being inherently loud. Solutions often involve better mounting isolation, vibration-reducing couplers, or moving the fan location when feasible. Noise is not something you should “solve” by turning the fan off.
Problem: The indicator shows no suction.
This can mean the fan lost power, a breaker tripped, the fan failed, or a pipe connection came loose. The safest approach is to contact your installer or a qualified mitigator and schedule service. EPA emphasizes watching your warning device regularly for this reason. EPA system maintenance guidance.
Problem: Condensation or moisture issues.
Some systems collect moisture in the pipe due to temperature differences and humidity. A qualified mitigator can adjust routing, slope, or drainage details. In cold climates, freeze concerns can matter.
Problem: A home sale creates questions about whether the system works.
The best answer is documentation and a recent test result. In real estate, vague assurance is not as valuable as a verified measurement.
How to choose a contractor
Sub-slab depressurization is common, but quality varies. EPA recommends using a qualified radon mitigation contractor because radon reduction requires technical knowledge and because improper work can increase radon or create other hazards. EPA Consumer’s Guide (PDF).
EPA also points consumers toward state radon offices and proficiency programs for finding qualified professionals. EPA qualified provider guidance.
One more important angle is standards. EPA lists current radon standards of practice and points to ANSI and AARST standards, including the Soil Gas Mitigation Standards for Existing Homes (SGM-SF). EPA standards of practice and AARST SGM-SF standard (online).
If you want a simple homeowner approach: get more than one estimate, ask what method they are proposing and why it fits your foundation, ask whether they perform diagnostic tests when needed, and ask what post-mitigation testing is included.
FAQs
Is sub-slab depressurization the same as “radon mitigation”?
Sub-slab depressurization is one type of radon mitigation system. It is one of the most common for basement and slab homes, but crawlspaces and mixed foundations may require variations or combinations.
Does the system remove radon or just move it?
It redirects soil gas so it vents outdoors instead of entering the home. That is enough to significantly reduce indoor levels.
Will sealing cracks lower radon without a fan?
Sealing is helpful as a supporting step, but NRPS notes sealing alone has not been shown to lower radon levels significantly or consistently and is difficult to do permanently. NRPS mitigation basics.
How do I know the system is working?
Check your system indicator and retest. EPA says you should look at your warning device regularly and that it is a good idea to retest at least every two years to ensure radon levels remain low. EPA system maintenance guidance.
How much does sub-slab depressurization usually cost?
NRPS reports an average cost around $1,200 with a typical range from about $800 to $2,500 depending on the home and needed methods. NRPS mitigation basics.
How low should radon be after mitigation?
EPA recommends fixing at 4.0 pCi/L or higher and considering action from 2.0 to 4.0 pCi/L. The EPA Consumer’s Guide notes that with today’s technology, radon levels in most homes can be reduced to 2 pCi/L or below, but results vary. EPA Consumer’s Guide (PDF) and EPA action level guidance.
Sources
- EPA: What is EPA’s Action Level for Radon and What Does it Mean?
- EPA: Consumer’s Guide to Radon Reduction (PDF)
- EPA: How do I know if my radon mitigation system is working properly?
- National Radon Program Services (Kansas State University): Intro to Mitigation
- EPA: Radon Standards of Practice
- AARST: Soil Gas Mitigation Standards for Existing Homes (SGM-SF)